Aircraft Data Assignment
When you select any assigned device in DATA ENTRY MODE, this section displays the data entry fields and parameters available for that I/O device type.
1. The easiest way is to use the data from the section on the right, where you can select a variety of complex predefined functions and assign data to a device with a single click on the image maps. There are also maps with predefined functions for standard and some popular aircraft (e.g., B738Zibo, A321 Tollis, B757 FF, and others).
2. You can also fill the command/dataref fields selecting standard or custom datarefs/commands from the tables in the right section, and add required values, conditions.
3. Finally, you can completely populate the data fields manually using any datarefs/commands from your own list (the Copy-Paste function is working, so you can use your external text file for this).
However, note that when the aircraft is loading, SimVimX plugin finds all custom datarefs for it and shows them in the [CUSTOM COM/DRF] section, so you can select them to directly
The right part of the main configuration window has three data entry section:
1. PREDEFINED FUNCTIONS
This section provides predefined standard or custom functions displayed as image maps, including: assignment maps for most standard X-Plane systems, maps for most standard X-Plane aircraft models, and maps for some popular custom plane models.
Image maps of various panel areas and entire panels make it quick and easily assign all the necessary I/O hardware, in addition to the ability to manually insert any standard or custom datarefs/commands.
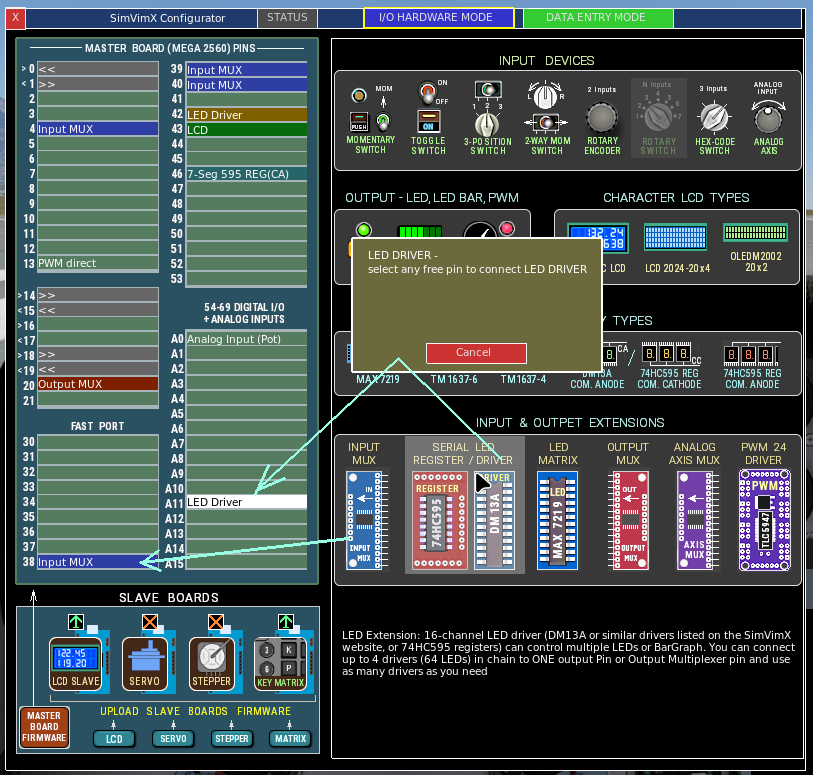
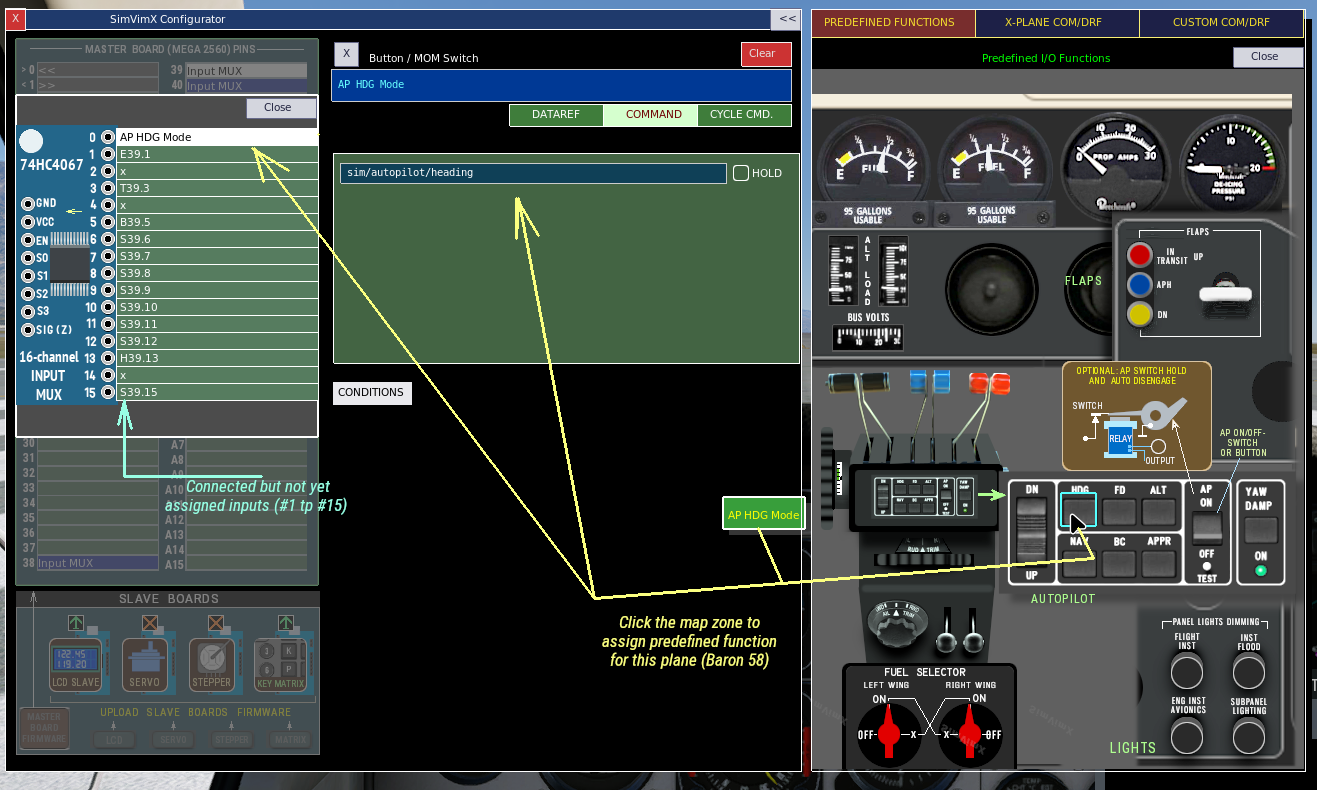
To configure any valid input or output, simply select the assigned hardware on the left side of the user interface in data entry mode (or connect a new device first), and then find and click the function you want to configure in the image map window:
Hover your mouse over the image and when the element is highlighted, click on the selected rectangular area. The input selected in the left side will be configured properly.
In the screenshot below a momentary button connected to multiplexer is assigned, that you can push right after assignment and watch how HDG autopilot mode indicator is turned On/Off (you may temporary close the right part clicking the [<<] button at the top of the configuration window to see more )
2. X-PLANE COM/DRF
The X-PLANE COM/DRF section contains the list of all X-Plane’s standard commands and datarefs usable for the cockpit hardware assignment grouped by categories. You can select one of the “connected” hardware items on the left side, select the dataref or command field you want to fill and then find and assign the relevant dataref of command(s) to it.
3. CUSTOM COM/DRF
The CUSTOM COM/DRF section contains the list of custom commands and datarefs detected by the plugin for the selected aircraft model.