Start the first aircraft configuration
Since you have just installed SimVimX 3, you have no saved data for any aircraft models and no I/O hardware configuration.
- You may already have the master board with all connected I/O hardware.
- It is not necessary to have the master board connected when you are going to work with a configuration.
- However, it’s better to have it connected and the firmware loaded – this allows you to see the result live.
Main Configuration Window
After launching X-Plane and an aircraft loading, open the SimVimX Configurator from the X-Plane menu –> SimVimX. Since the loaded aircraft is the first one and does not have a configuration yet, the main SimVimX window will open in the Configuration options mode.
On the left side of the window, you can see that there is no I/O hardware connected to the master board yet, although the master board certainly may have physically connected devices, especially if it is your old working hardware setup for the version 2.22:

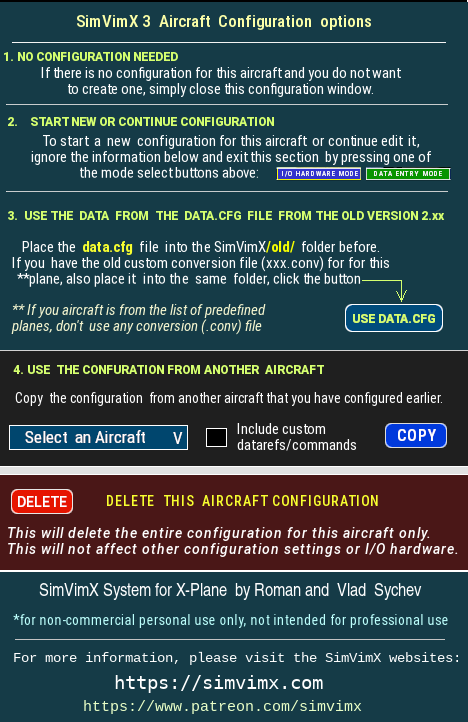
When you first open the configuration window, you’ll see five options to choose from (including delete and “do nothing”). However, for the first aircraft you want to configure, you can only select two options to get started (#2 and #3):
2. Create a configuration for this plane from scratch
To start creating a first aircraft configuration from scratch based on physically connected hardware, click the button to start connecting I/O devices
If you have already connected any devices to the Mega2560 master board, you need to properly “connect” all the same devices in the SimVimX configurator, carefully checking the pin numbers and selecting right device types.
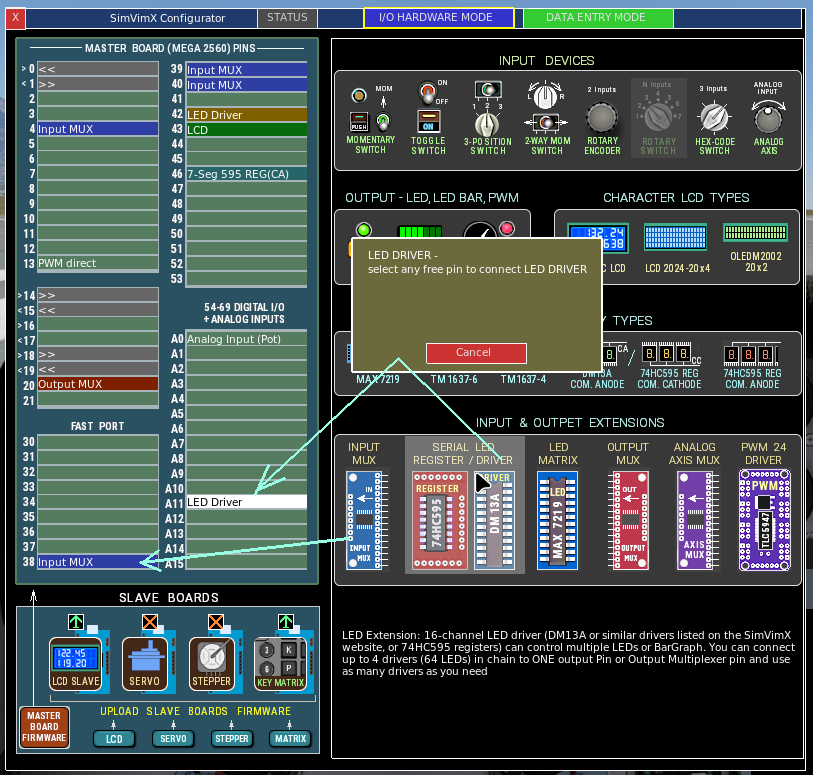
The physical connections and assigning hardware in the configurator can be made in any order and you can gradually add or disconnect different devices as needed for work or testing.
See the related page about hardware setting.
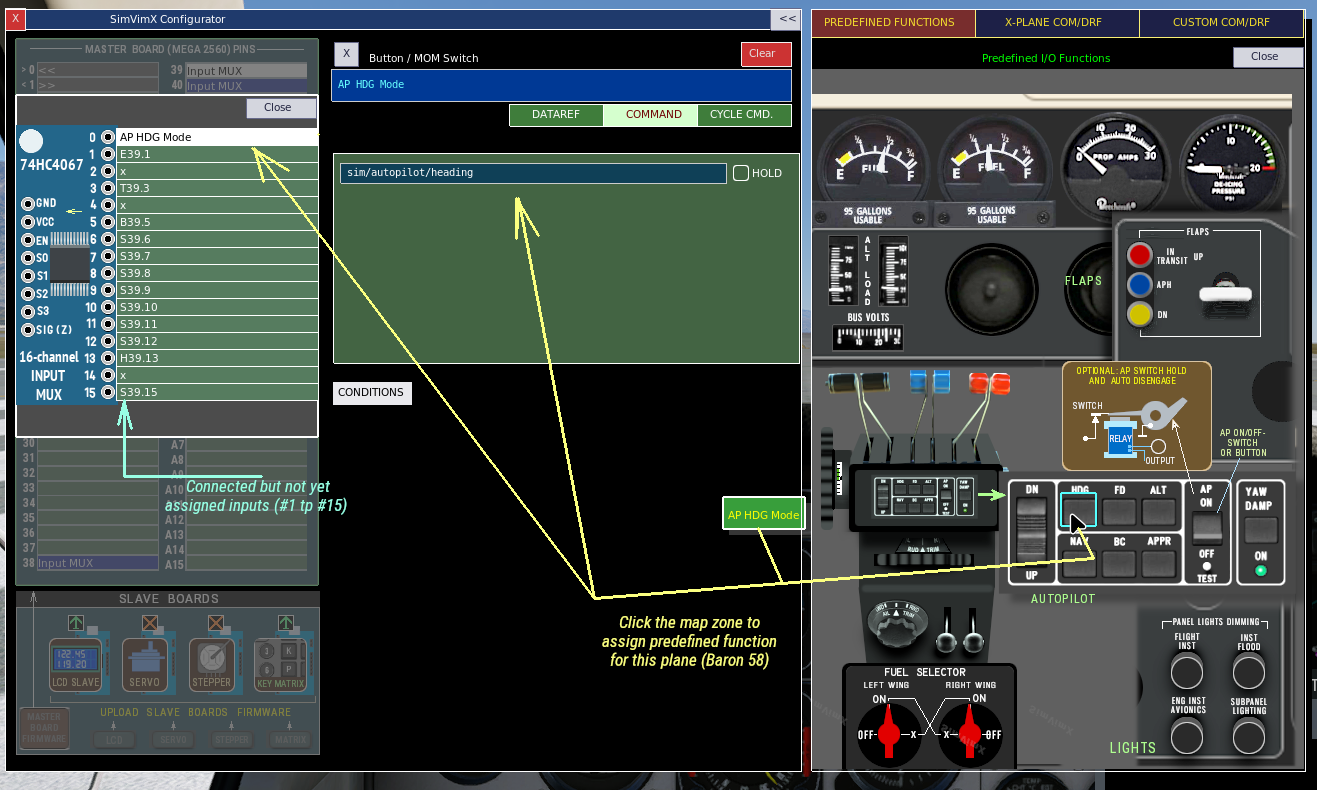
Every device you have connected can be then configured for the plane model using either predefined mappings or standard and custom datarefs and commands for this plane in the .
3. Use the data from the old data.cfg file
When you choose to create the configuration using the old data.cfg file, you don’t need manually add (“connect”) all I/O hardware to the master board, Once you click the button all devices will be automatically added and you will se them all “connected to the board
1) Before selecting this option, place the old SimVimX v.2.2 configuration file (data.cfg) into the SimVimX/old/ folder.
If the file for this aircraft named differently (like “Your Plane v1.cfg”), rename it to data.cfg
2) If you had the custom conversion file for your plane (you_plane.conv) also place in to the same SimVimX/old/ folder.
Note: If you aircraft is from the list of predefined planes (see below of this page), you should not place any conversion (.conv) file to the folder
The plugin will use the data from these files to create an aircraft configuration for the new version 3.**. After this, you will no longer need the old .conv file. You also won’t need the data.cfg file unless it’s required for other aircraft.
3) Click the button USE DATA.CFG (it will do nothing if the data.cfg file is missing).
For the first aircraft you create a configuration for in SimVimX v.3, all data from the old data.cfg file will be used to generate all hardware input/output connections displayed in the user interface. All input/output data for the aircraft itself will be converted and assigned using commands and datarefs with parameters.
If the aircraft has a built-in or external conversion, custom datarefs and commands will be automatically assigned to the selected aircraft with all the necessary numeric and logical parameters, which you can then easily edit or change as needed.
List of predefined aircraft in the current SimVimX database:
Custom planes:
- Boeing 737-800 Laminar/Zibo Mod
- Boeing 757-200 / 767 FlightFactor
- Airbus A321 Toliss
- Socatta TBM900 HotStart
- Dash8-400 Q4XP FlyJSim
- Diamond DA-62 Aerobask
X-Plane standard:
- Boeing 737-800 Laminar
- Cessna 172 Laminar
- Baron 58 Laminar
- King Air C90B Laminar
- Cessna Citation X – Laminar
For all of these aircraft, you can quickly set/adjust the parameters using corresponding predefined image maps on the right side of the main configuration window.