Configurator: Data Entry Options
This section describes the data input options using an input multiplexer as an example, but it is applicable to any input or output.
Assign Input data using predefined image maps
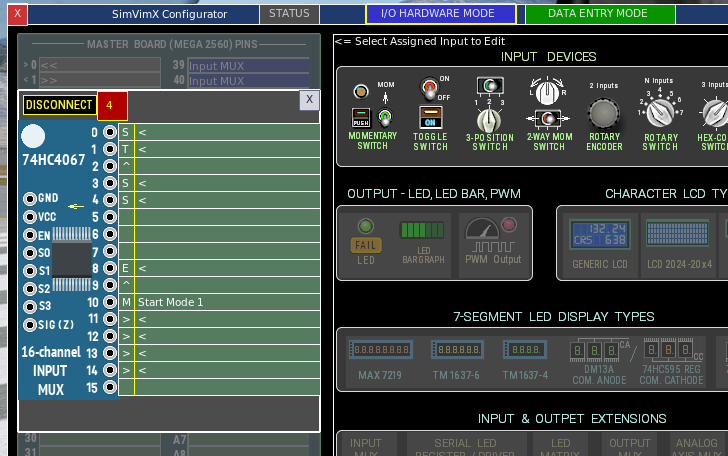
- Open the Input MUX window (click the pin it’s connected) in DATA ENTRY MODE
- Select the multiplexer pin with the input device you want to configure. The data entry section will open in the middle window.
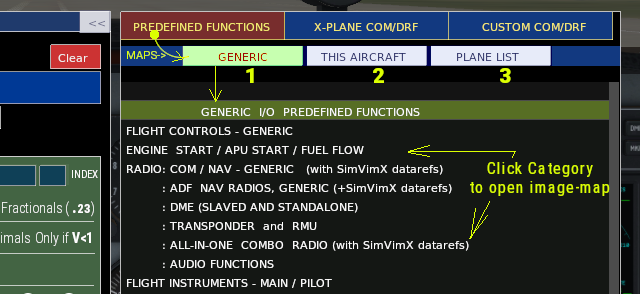
- Open the desired image map in the “PREDEFINED FUNCTIONS” section in the right window.
- On the image map, locate and click the cockpit input element you want to assign to the selected device.
- All needed text fields will be filled in and the configuration will be saved.
Any predefined SimVimX map can be used not only for the aircraft it applies to but is also useful, especially for beginners, for learning how to manually configure specific switches or indicators if your aircraft model is not included in the list of predefined parameters.
Assign Input data using dataref/command list
- Open the Input MUX window (click the pin it’s connected).
- In DATA ENTRY MODE select the multiplexer pin with the input device you want to configure. The data entry section will open in the middle window.
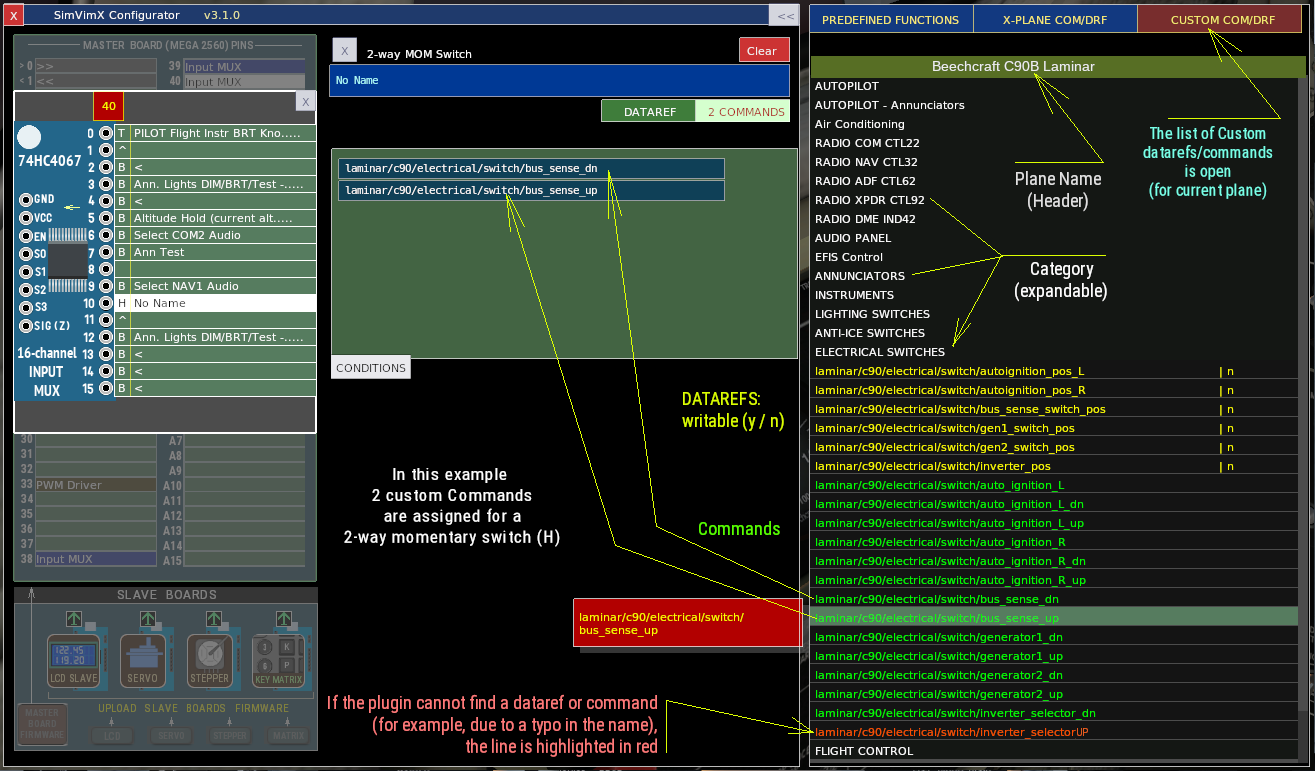
- Open the X-PLANE COM/DRF or CUSTOM COM/DRF list in the right window.
- In the data entry section select the data type used for the selected input (Commands, Dataref or combinations)
- Select the text field that you want to fill with the command or dataref.
- Find needed command or dataref in the right window and click on it to insert it to he selected text field:
Manual data entry
Almost all X-Plane standard datarefs and commands that can be used to assign any cockpit inputs and outputs are included in the SimVimX configurator and can be selected and assigned directly as described above.
You can also select and assign custom aircraft datarefs and commands (for the currently loaded aircraft model), but the method for creating a custom list of aircraft datarefs in the SimVimX plugin needs improvement.
So if you can’t find the dataref or command that you need in the SimVimX lists, you can fill in the data fields manually using datarefs/commanda from your own list (the Copy-Paste function is working, so you can use your external text file for this, using Ctrl+V):